

A beginners guide to screen printing t-shirts. Whether you are printing for a hobby, a side hustle or a full time business, screen printing is a trade that requires a lot of learning. Below we break down the process into simple steps that will have you confident printing your first t-shirt.
Each step of the process is important, screen printing requires attention to detail through the whole printing journey in order to succeed!
Note: This blog is a high level overview of the screen printing process. Before printing we recommend that you ready more in depth about each step of the process and visit the blog links included in this guide.
For in depth step by step directions please download our Screen Printing Guide Book, we suggest using this booklet alongside you as you print.
Preparing & Printing Artwork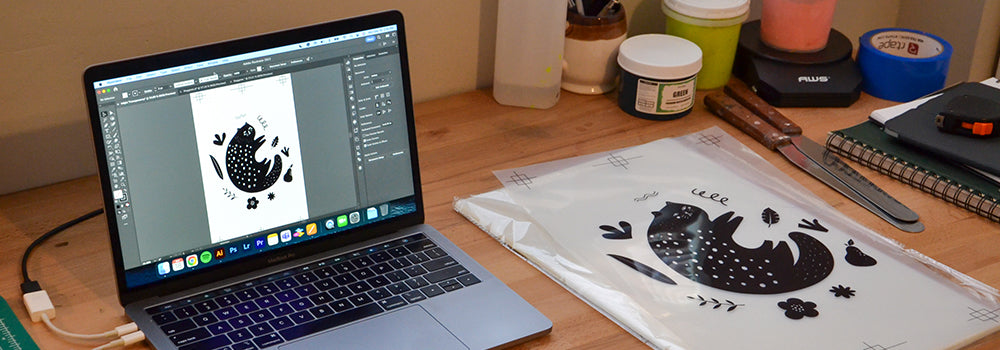 This is the fun part! What do you want to print on your t-shirt? How many colors will be in your design? How detailed will this print be? And how will you create this design?
Keep in mind that multiple color prints require more work when making screens, you will need separate screens for each color and need to use something to separate your colors when printing. If you are just beginning, we highly recommend one color prints.
Artwork detail is also important when it comes to screen printing, the level of detail will require different mesh on your screen and possibly different emulsion types. Keep it simple for your first print. Think more block text and easy artwork.
Many printers use Illustrator and Photoshop for their artwork; however, this does require knowledge of these programs. If you do not have a printer, you can use a sharpie or an opaque (dark) marker to draw your design onto the film transparency.
Notes:
The inkjet transparency artwork must be fully opaque; if it is not opaque enough, it will directly affect the outcome of the stencil. One way to test the opacity is to hold the inkjet film up to the sun or light, and if you can see any light coming through the black ink, it is not opaque enough.
Related Blog: Selecting the Right Inkjet Printer for Screen Printing
Exposing Your Image onto a Screen Now that your artwork is done, it’s time to create your stencil. Creating a stencil is done by burning the image you printed onto inkjet film onto a frame coated with emulsion. When you burn the image into the frame you wash out the emulsion that was not exposed to the light and are left with a stencil that is used to create your t-shirt.
Emulsion is a thick, light-sensitive glue that is used to create stencils for screen printing. Therefore, you need to use it in a light-safe environment (closet, bathroom, pantry, garage, basement, etc.) and allow it to fully dry before moving on to the next step in the stencil-making process. Most printers use a space called a darkroom to expose their emulsion. A darkroom is a room that has a light that is safe to be around emulsion, such as a yellow or red light, and will not cause it to expose prematurely. If your emulsion is exposed to light before the appropriate time you will not burn your screen properly and have to start the process over.
Before you can expose the screen, you will need to coat your screen with emulsion. The goal in this process is to have a nice, even, and thin layer of emulsion on both sides of the screen, NOT a thick dripping layer of liquid. The emulsion must be 100% dry in order to start the exposing process.
Exposing your screen can be a tricky part of the process as different variables can affect exposure. You want to expose your screen under an exposure light so that the artwork you have printed onto the inkjet film is burned into the emulsion. After you burn the screen with the light you will wash out the image with a pressure hose. The goal is to see your image perfectly with crisp lines when you wash out the emulsion.
Note: Emulsion is not a one size fits all product, the correct emulsion must be used for the current printing project. Not sure what emulsion to use? We have a quiz for that, click here to take now.
Related Blog Posts:
Help! Screen Printing Emulsion Troubleshooting
Variables Affecting your Exposure Time
How to Make a Silk Screen Stencil
Setting Up the Screen Printing Press With your screen you are almost ready to print. There is some equipment required to print t shirts properly. A screen printing press or clamp hinges are needed in order from your prints to come out perfect each time. There are a lot of options for screen printing presses however if you are just beginning we highly recommend a single color press. A manual single color press has a platen in which you load your t-shirt onto print and a mount that helps to hold everything in place for perfect printing placement.
You will place your screen into the press and anchor it into position. For a clear and crisp print, printers use a method called “off contact.” This refers to when the mesh is held slightly up and off your print surface until the time you press it down to pass the ink through the mesh. To create “off contact,” tape a coin under each bottom corner of your screen before you print.
Related Blog Posts: Master Inkjet Film Alignment with 4 Easy Tips
Printing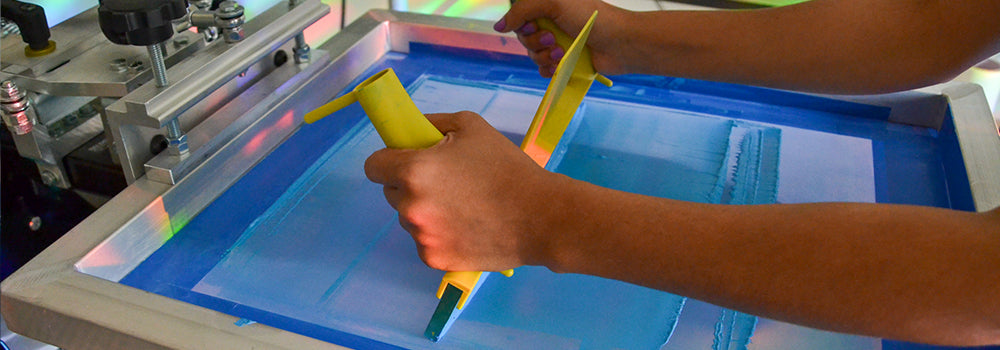 Now that your screen is loaded into the screen-printing press you are ready to load your garment onto the printing press and print. You will need to put down an adhesive to hold your garment in place on the press.
With your t-shirt in place you can lower your screen and then scoop ink onto the frame with a spatula. We highly recommend taping off any open areas of the screen you don’t want to get ink through, such as the edges of the screen, before you load ink onto the screen.
Next take a squeegee and flood the screen with ink. What does it mean to flood the screen? Using your squeegee, pull the ink across your artwork and make sure your image is completely covered. Flooding requires minimal pressure, as you are not pushing ink through the mesh yet, so only a thin layer is necessary.
Once the screen is flooded you will print. Grab your squeegee and hold it at a 45-degree angle and pull or push it across the screen with hard and even pressure. Generally, it should only take 1-2 passes on light fabric.
Now that your image is onto the t-shirt with ink you will cure your t-shirt. It’s time to properly cure your ink so that it does not come off in the washer. The type of ink you are printing with will determine how you need to cure the ink. Use a heat gun, flash dryer, heat press or conveyor dryer to cure at the inks recommended cure temperature for one minute. Once the ink is cured, you have completed your first print!
Related Blog Posts:
Plastisol Screen Printing Ink 101
Water Based Screen Printing Ink 101
For all blogs pertaining to screen printing education and business resources please visit our Resource Center.